This will walk you through the process of setting up Google OAuth for your Zipline instance.
Create a Google OAuth2 Application
Configure OAuth consent screen
- Click "OAuth consent screen" on the sidebar
- It will ask you if you would like Internal or External, read the descriptions and choose the one that best fits your use case.
- Fill in the required fields like App name, User support email, Developer contact information, etc.
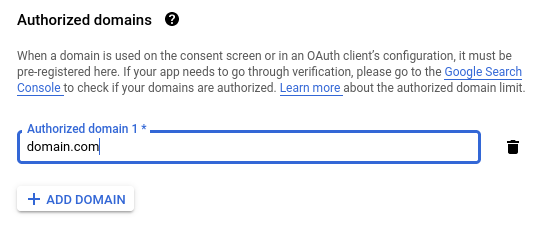
- Under Authorized domains, add your Zipline domain without the protocol (e.g.
example.cominstead ofhttps://example.com).
- Click the "Save and Continue" button.
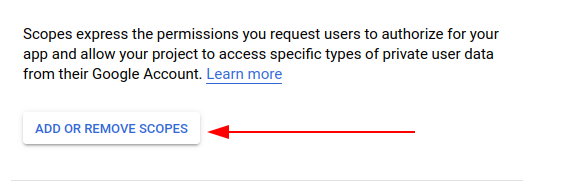
- Click the "Add or Remove Scopes" button on the next page.
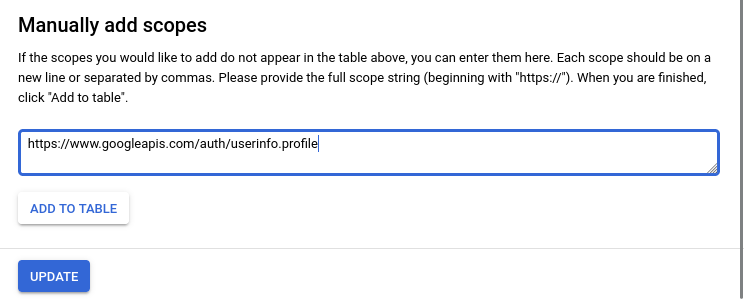
- Under "Manually add scopes" add the following scopes:
https://www.googleapis.com/auth/userinfo.profileThen click the "Add to table button" button.
- Click "Update" button.
- Click the "Save and Continue" button.
- Feel free to add test users to your liking, then hit the "Save and Continue" button again.
- Finish the setup and head to the next section Create Credentials.
Create OAuth2 Credentials
- Head over to Google Cloud > Create OAuth client ID
- Select "Web Application" under Application Type
- Under "Authorized redirect URIs", add
https://<your-domain>/api/auth/oauth/google - Under "Authorized JavaScript origins", add
https://<your-domain>
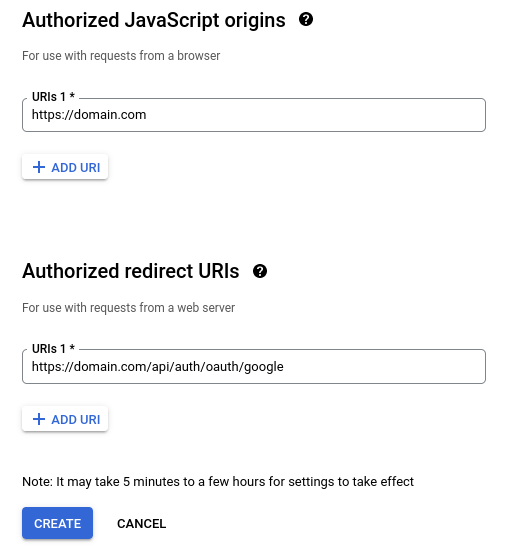
- Click "Create"
- On the next screen you will see your "Client ID" and "Client Secret". Save these for later, as you will not be able to see the secret again.

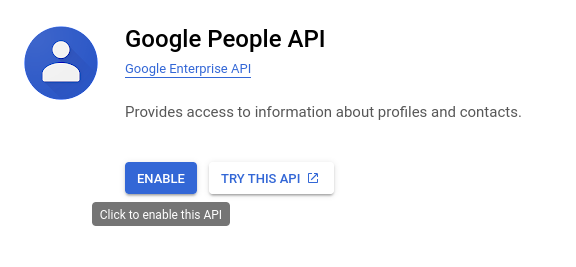
- Click "Library" on the sidebar
- Search for "People API" or click here
- Click "Enable", and wait for it to finish loading.
Configure Zipline
Set the OAUTH_GOOGLE_CLIENT_ID and OAUTH_GOOGLE_CLIENT_SECRET environment variables to the values you copied earlier.
OAUTH_GOOGLE_CLIENT_ID=1234567890OAUTH_GOOGLE_CLIENT_SECRET=qwertyuiopasdfghjklzxcvbnm
Make sure you have the FEATURES_OAUTH_REGISTRATION environment variable set to true, or none of the endpoints will work.
If you have set up everything correctly, you can now navigate to the login page and click the "Login with Discord" button.
GitHub
This will walk you through the process of setting...
Clear Zero Byte Files
This script will try to find and delete any files...
Last updated: 8/4/2023
Edit this page on GitHub